The part(s) or condition(s) listed below for the symptom Microwave is loud or noisy are ordered from most likely to least likely to occur. Check or test each item, starting with the items at the top of the page.
 Microwave Turntable Not Turning? Microwave Oven Troubleshooting
 Microwave Not Working? Microwave Oven Troubleshooting
 Microwave Not Heating? Microwave Oven Troubleshooting
 Microwave Light Bulb Not Working? Microwave Oven Troubleshooting
 Microwave Is Loud/Noisy? Microwave Oven Troubleshooting
 Microwave Exhaust Fan Not Working? Microwave Oven Troubleshooting
 Microwave Buttons Not Working? Microwave Oven Troubleshooting
 Removing Microwave Trim - Tech Tips from Repair Clinic
 Replace Microwave Charcoal Filter - Tech Tips from Repair Clinic
 Boil Water in Your Microwave - Tech Tips from Repair Clinic
 5 Tips For Your Microwave - Tech Tips from Repair Clinic
 Microwave Sparking/Arcing? Microwave Troubleshooting
 Microwave Door Won't Open? Microwave Troubleshooting
 Microwave Turns On By Itself? Microwave Troubleshooting
 Microwave Display Not Working? Microwave Troubleshooting
 Microwave Shuts Off After A Few Seconds? Microwave Troubleshooting
 What Causes a Microwave to Spark and Arc?
The fan motor bearings can wear out causing a rumbling or squealing noise. If the fan motor is making noise when its running it will need to be replaced.
The magnetron uses high voltage, high current DC power to generate the microwave frequency that cooks the food. Under normal circumstances, the magnetron emits a low hum. However, if the magnetron is damaged or nearly burned out, it may begin emitting high-pitched sounds or growling noises. If the magnetron is noisy, this indicates that the magnetron is nearing the end of its life or might be defective. A defective high-voltage diode can also cause the magnetron to be loud. Before replacing the magnetron, first test the high voltage diode. If the diode is not defective, replace the magnetron. (Warning: The microwave oven can store a lethal amount of electricity in its high voltage capacitor, even after the microwave oven has been unplugged. Due to the high running voltage and the potential for electric shock, it is extremely dangerous to replace the electronic components in a microwave. Only a licensed technician should replace the magnetron.)
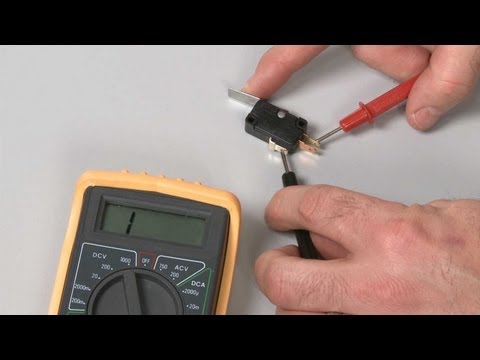
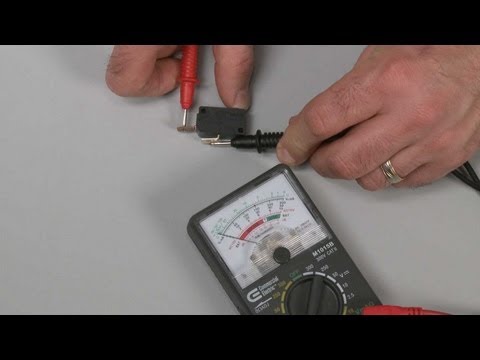
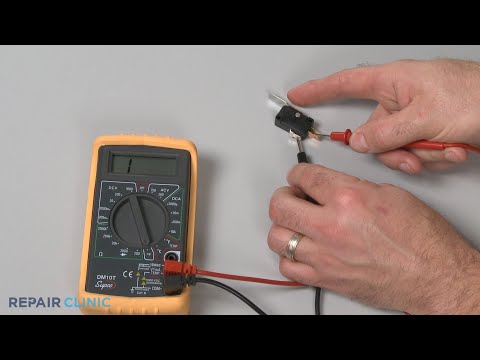
The diode converts the AC power output of the transformer to DC, doubling the voltage to nearly 5,000 volts. This high voltage powers the magnetron to heat the food. A failing diode can be responsible for a noisy magnetron. When the diode fails, it is often visibly burned out. Inspect the diode and if the diode is burned out, replace it. If inspecting the diode proves inconclusive, test it with a multimeter that uses a 9-volt battery or put a 9-volt battery in series with the diode. When the leads are reversed, the diode should only have continuity in one direction.
To determine if the fan motor is defective, remove the fan motor from the microwave and try turning the fan blades by hand. If the blades do not turn freely, replace the fan motor. If the fan blades do turn freely, use a multimeter to test the motor for incoming power and for continuity. If the motor has power but won’t run, replace it. If the motor does not have continuity, replace it.
The microwave glass tray support is the component that sits under the glass turntable tray to support the tray as it rotates. Over time, the small rollers on the support can wear out and start making a noise as the tray turns. If you've determined the glass tray support is the source of the noise, the part should be replaced with a new one.
The stirrer is a metal blade which slowly rotates inside in the microwave. As the stirrer turns, it deflects the microwave energy randomly throughout the microwave. As the stirrer motor wears down, it begins to make grinding noises. To determine if the stirrer motor is worn out, check to see if voltage is getting to the motor. If the motor has the proper voltage, but is noisy or won’t turn, replace it. (Note: Proper voltage can be determined by reading the label on the motor. Because the stirrer motor is a geared motor, the shaft will not spin freely.)
To determine if the turntable motor is worn out, check to see if voltage is getting to the motor. If the motor has the proper voltage, but is noisy or won’t turn, replace it.
High Voltage Transformer
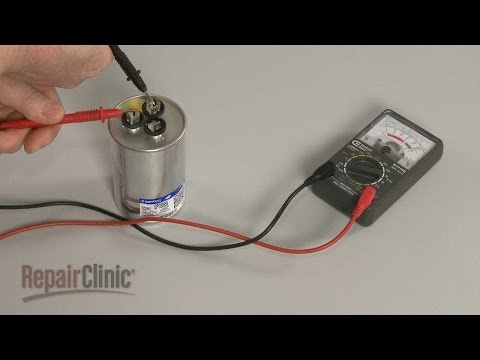
The high voltage capacitor works with the high voltage diode to convert the output of the transformer to DC voltage and to double the output voltage. If the capacitor is failing, it may cause other high voltage components to become noisy.To determine if the high voltage capacitor is failing, use a VOM meter with a capacitance testing capability.